14 February 2015

Coconut Berry Smoothie

Once again I have a recipe that is so easy it shouldn't be allowed to be referred to as a recipe. I thought this would be a nice, last minute Valentine's day treat if you want to do something special but don't want to/forgot to buy chocolates or a card. It's a really yummy smoothie type treat that takes no time at all. And it's pink! 
You could of course substitute all the fruit for other fruit of your choice as this doesn't have to just be Valentine's day appropriate. Hope you enjoy this 'recipe'!

Ingredients:

3 pots of greek yoghurt 
handful of raspberries
handful of blueberries
handful of strawberries
muesli
coconut sprinkles 
3 tbs honey

Serves 2

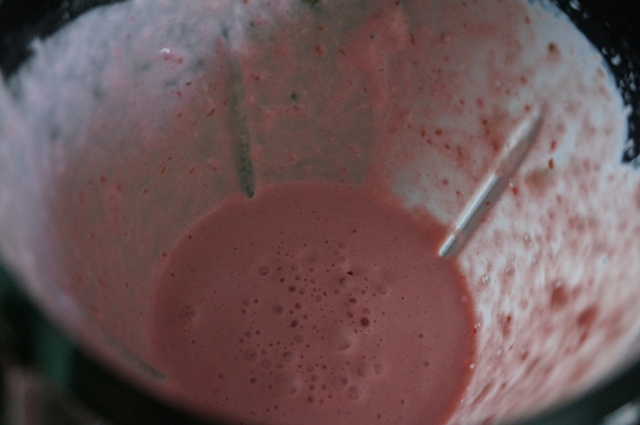
Put the yoghurt, honey, a handful of raspberries and strawberries (you could add blueberries but the whole point is to make the yoghurt pink) and some grated coconut into a blender. That's it, that's literally all you have to do. 
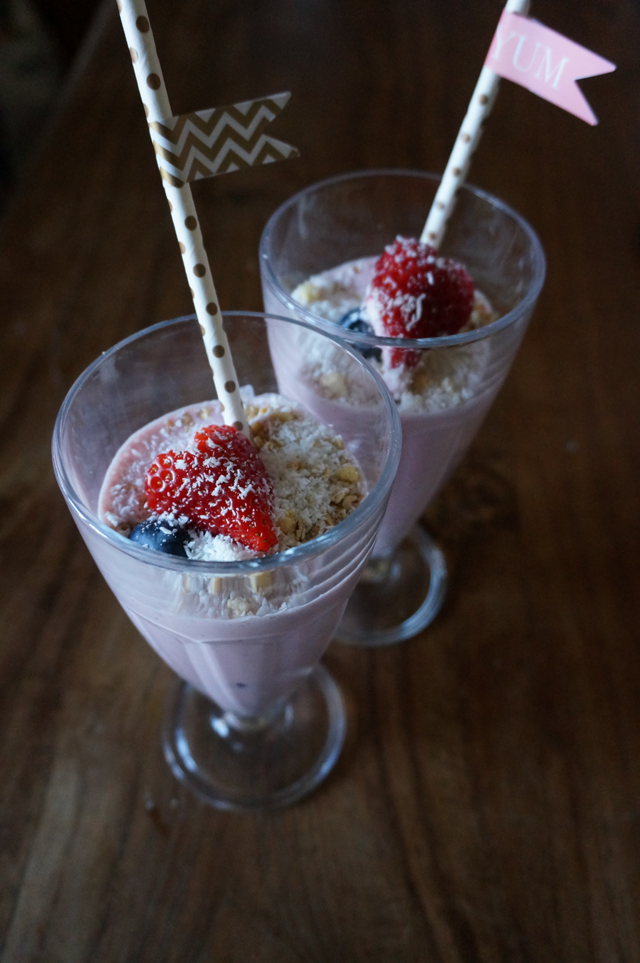
You can drink it like that or you can do what I did which was layer some more berries and some muesli in a large glass, then pour in the smoothie mixture and top with more berries and grated coconut. I also (tried to) cut a strawberry to resemble a heart since this is meant to be a Valentine's day treat. 

Milkshake glasses - Delhaize
Paper straws - Ava

13 February 2015

Smokey Bronze Valentine's Day Look

This is my second Valentine's day/date night look, you can read the first one here. This look is slightly darker what with the red lip and bronze eyes but involves a lot less eyeshadows. I decided to do my base differently and used a brown pencil that I then blended upwards as well as a cream eyeshadow. Together they made the colours a little more intense and they lasted quite some time too, considering they are both by Maybelline (as opposed to my usual Nars base). I kept the rest of my face quite bronzed and let the lipstick steal the show. Cruella is a velvet matte lip pencil and I absolutely adore it. It lasted all day and looked amazing. I don't often do dark red lips but I really loved this one. 
Hope you've all had a great week!

Face:
Collection Lasting Perfection Concealer in Cool Medium 2:
on blemishes
Manhattan Soft Compact Powder in 0 Transparent:
to set the concealer
Sleek Face Form palette in Medium:
contour, bronzer & highlight

Eyes & Eyebrows:
Soap & Glory Archery Brow Pencil in Blondeshell:
to shape and fill in my brows
Maybelline Master Smoky Shadow-Pencil in Smoky Chocolate:
on the lashline then blend up all over the lid
Maybelline Color Tattoo in 35 On & On Bronze:
all over the lid as a base
NARS Eyeshadow in Lola Lola:
all over lid, blended out and on lower lashline
Urban Decay Naked 2 palette:
Snakebite & Busted on outer corner
Urban Decay 24/7 Glide On Eye Pencil in Zero:
smudged on top and lower lashline
Maybelline Go Extreme Mascara in Leather Black 

Lips: 
NARS Cruella lip pencil

12 February 2015

Cookies & Cream Cupcakes


These are basically Oreo cupcakes, except I used those fake knock off oreos. I've made these twice, once following the quantities and method used in this recipe however the batch made 22 cupcakes, not 12. So be aware of that if you ever follow that recipe. As per usual, I made a few changes but it still ended up making 22 cupcakes. So if you don't like things not being even and perfect, look away now!
I made up my own icing as well since I thought 350g of sugar was a bit excessive but that's personal taste. I added a bit of red food colouring too to make it pink and more Valentine's day appropriate but you don't have to do that because cake and chocolate shouldn't be celebrated just one day of the year. (What do you mean that's not what Valentine's day is about?) You could also add crushed oreos to the mixture for extra crunch and yumminess. I decorated them with red fondant hearts (I just rolled the fondant out and used heart shaped biscuit cutters), strawberries and crushed oreos. 
I bought these amazing cupcake boxes in a shop called Ava (which I have recently been obsessed with). It is basically a huge stationery/office supply shop that also sells baking stuff. Two of my favourite things combined! The boxes make the cupcakes look even cuter and slightly professional which is a plus when your decorating skills are as non-existent as mine.

Ingredients:

200g plain flour
280g caster sugar
40g cocoa powder
40g crushed oreos
3 tsp baking powder
pinch of salt
80g unsalted butter
240ml Milk
2 eggs
1/2 tsp vanilla extract
22 oreos
22 cupcake cases

Icing:
250g mascarpone cheese
150g icing sugar
red food colouring

Decoration:
strawberries, red fondant, more crushed oreos

Preheat the oven to 170°C and line your muffin tray then add an oreo to each case. I did 12 like this and then decided to experiment a little and added a few oreos on top of the batter and a few stuck inside the batter. They all baked properly and tastes amazing!
Add the flour, butter, sugar, cocoa powder, baking powder and salt in a large bowl and mix until you get a sandy consistency, then add the crushed oreos and mix again.
In a separate bowl, mix the milk, eggs, and vanilla extract together then add half into the flour mixture and mix together so that it all sticks together in a lump. Then add the rest of the milk mixture and mix until smooth.
Fill the paper cases about two-thirds and bake for 20-25 minutes. When you stick a knife in to see if they are done, bear in mind that there are oreos at the bottom and the cream tends to make it look like the cupcakes aren't fully baked when they actually are. 
For the icing, mix together the mascarpone and the sugar until smooth. Then slowly add red food colouring. It's better to do this bit by bit to make sure you get the right colour. 
Once the cupcakes have cooled you can decorate them. This particular icing probably isn't the best for piping as it's a bit runnier than your standard icing, so just use with a knife. I'm not the best at icing so this suits me just find. My technique is to splat it on and spread it a little until it looks artistically messy.
Then decorate them however you want and you're done!

10 February 2015

Rose Gold Soft & Sweet Valentine's Day Look

Hi everyone,
I felt like doing a makeup look using my Naked 3 palette and what with Valentine's day just around the corner, it seemed like a good time to do it. Even if you aren't celebrating Valentine's day you could still do this look because despite using a lot of different eyeshadows, I would still say it is wearable. The brown liner makes it a little less harsh too.
To go along with the pink theme I used my soft pink Nars blush in Amour. It's quite subtle and looks really pretty when lightly dusted on the cheeks. I also used my current favourite lip pencil which is in a rather sorry state after I tried sharpening it (sob) but still works perfectly fine. 

Face:
Collection Lasting Perfection Concealer in Cool Medium 2:
on blemishes
Manhattan Soft Compact Powder in 0 Transparent:
to set the concealer
Sleek Face Form palette in Medium:
contour, bronzer & highlight
NARS blush in Amour

Eyes & Eyebrows:
Soap & Glory Archery Brow Pencil in Blondeshell:
to shape and fill in my brows
NARS Pro Prime Eyeshadow Base:
all over my eye lid and crease
Urban Decay Naked 3 palette & MAC palette:
Nooner in the crease, Liar and MAC Sable on the lid & blended upwards, Strange in the inner corner, Darkside & Factory in the outer corner and outer lower lash line, Trick in the center of the lid and inner, lower lash line
Urban Decay 24/7 Glide On Eye Pencil in Whiskey & MAC Teddy eye liner :
on top and lower lashline
Chanel Inimitable Mascara

Lips: 
NARS Descanso lip pencil

9 February 2015

Zoeva Rose Golden Complete Eye Set

L-R: 315 Finer Liner, 237 Detail Shader, 317 Wing Liner, 230 Luxe Pencil, 322 Brow Line, 226 Smudger, 224 Luxe Defined Crease, 234 Luxe Smoky Shader, 228 Luxe Crease, 231 Luxe Petit Crease, 227 Luxe Soft Definer, 142 Concealer Buffer
Last year I bought my first set of rose gold Zoeva brushes (blogpost here) and I have been in love with them ever since. So when I saw that Zoeva had a whole rose gold set dedicated to eyes, it was only natural that they were the first thing I put on my Christmas wishlist. And my amazing mum bought them for me! Thanks mum!
If you have been reading my blog for a while, you may know that I don't do too much to my face when I apply makeup (although recently I have been branching out and using things like bronzer and highlight). I have sensitive skin which means I skip the foundation step and don't like having too much powder on my face either, so I usually just focus on my eyes. I love playing around with eyeshadows and liners and that obviously requires a few different brushes (or no brushes at all for some people!). I mentioned in my other Zoeva blogpost that I can be quite lazy when it comes to washing my brushes. I try to do them once a week, but let's be honest here, I do sometimes 'forget' (read: knowingly put the thought of washing brushes to the back of my mind). 
Funnily enough, I don't own that many brushes that are meant for eyeshadow. I have a few Real Techniques ones, as well as the Urban Decay Naked palette brushes. So that's one reason as to why I so desperately wanted these brushes. The other being that they are ROSE GOLD. Ok breathe. I have been obsessed with rose gold for a while (January 2012 to be precise) just like the rest of the beauty world. And can you blame us? Look how beautiful it looks! Brushes, jewellery, home decor, everything. (Maybe not everything, but you get the point.) Apart from being incredible at their job as makeup brushes (I'll go into more detail in a minute), they also make my dressing table look beautiful.
Moving on to their function and all of the details. You get 12 brushes in a set which is great especially when you look at the price of the set (65€). That equates to exactly 5,41€ per brush which is amazing value for money.
The set comes in another fancy brown pouch with the rose golden Zoeva logo embossed on it. These are really handy for travelling as it can be rather tricky to find makeup bags that are long enough to fit brushes in. I used the other one every time I traveled last year and will definitely be putting this one to good use too.
All of the brushes are incredibly soft and work like magic. They make applying makeup really simple and fast. I also found that they are easy to clean, the powders/liners seem to disappear after the first few seconds of washing them. They dry fairly quickly too and go back to their original shape, although I did find that some of them had a few sticky out bristles, but nothing too bad and I could easily push them back into place. (If you want to see how I wash my brushes, click here.)
Like the original brush set, this one comes with the 227 Luxe Soft Definer (great for blending, I actually prefer it to my MAC 217 brush), the 231 Luxe Petit Crease (the name says it all, it's great at getting right in the crease), the 142 Concealer Buffer (again, the name says it all but this one is also great for blending eyeshadows together) and the 317 Wing Liner (which I use to fill in my brows with powder). I honestly don't mind having these brushes twice, because they are incredibly useful and it's always good to have a few extra clean options for blending eyeshadows for example. 
I really like that there is a brush for everything. You can obviously use them however you want, but I personally use the majority of them how they are 'meant' to be used. 
As well as the brushes I've just mentioned, you also get a bunch of others. The 224 Luxe Defined Crease is like a slightly thinner, longer version of the 227, it's great at blending shadows through the crease and all over the lid. The 234 Luxe Smokey Shader is the perfect brush for applying colour to the lid and I also like using the 226 Smudger to do that too, especially when you want to apply an eyeshadow to the lashline. The 228 Luxe Crease is a bigger version of the Petit Crease brush, again great for applying eyeshadow in the crease. The 315 Finer Liner brush makes applying liner (gel, kohl, shadow) so easy and I often find it difficult using a separate brush for that job but I really like this brush! The brush itself is really small and tapered, and the dent makes the application so simple. I love using the tiny 237 Detail Shader to apply highlight to the inner corner of my eye and also on the brow bone. It's like a really small version of the Smoky Shader. The 230 Luxe Pencil is great for smudging liner and apply shadow on the lower lashline. And finally there's the 322 Brow Line which is the only brush I haven't actually used yet. I always mean to use it to fill in my brows whenever I feel like using a powder but I always end up forgetting. It has a slight angle but is quite a bit thicker than your usual standard brow brush. 
Once again, Zoeva have delivered. You can check them out here. I have yet to try out any of their makeup though and am actually quite tempted to get one of their palettes!
Have you tried any Zoeva brushes?

2 February 2015

Matte Chocolate & Shocking Pink

I have recently been obsessed with two things: the Sleek Face Form palette and the NARS Digital World Lip Pencil set. I was lucky enough to get both of these for Christmas last year. I had never really been into contouring or even using bronzer but I"m starting to make more of an effort with both of those steps. I've also been using the contour and bronzer shades as eyeshadow because they are both so gorgeous and this makes getting ready a lot easier as I'm using one product for several different parts of my face. Most of my matte brown eyeshadows are on the cooler scale of shades so it's nice to have some warmer tones. I've been switching between theNARS lip pencils a lot and my absolute favourites at the moment have to be Yu and Descanso. Both extremely beautiful and they last quite a while. I really love pairing a brown smokey eye with bright lips and Yu seemed like the perfect option. 
Have a great week!

Face:
Collection Lasting Perfection Concealer in Cool Medium 2:
on blemishes
Manhattan Soft Compact Powder in 0 Transparent:
to set the concealer
Sleek Face Form palette in Medium:
contour, bronzer & highlight

Eyes & Eyebrows:
Soap & Glory Archery Brow Pencil in Blondeshell:
to shape and fill in my brows
NARS Pro Prime Eyeshadow Base:
all over my eye lid and crease
Sleek Face Form palette in Medium:
matte shade all over the lid and blended through the crease
Urban Decay 24/7 Glide On Eye Pencil in Zero:
smudged on top and lower lashline
Maybelline Go Extreme Mascara in Leather Black 

Lips: 
NARS Yu lip pencil